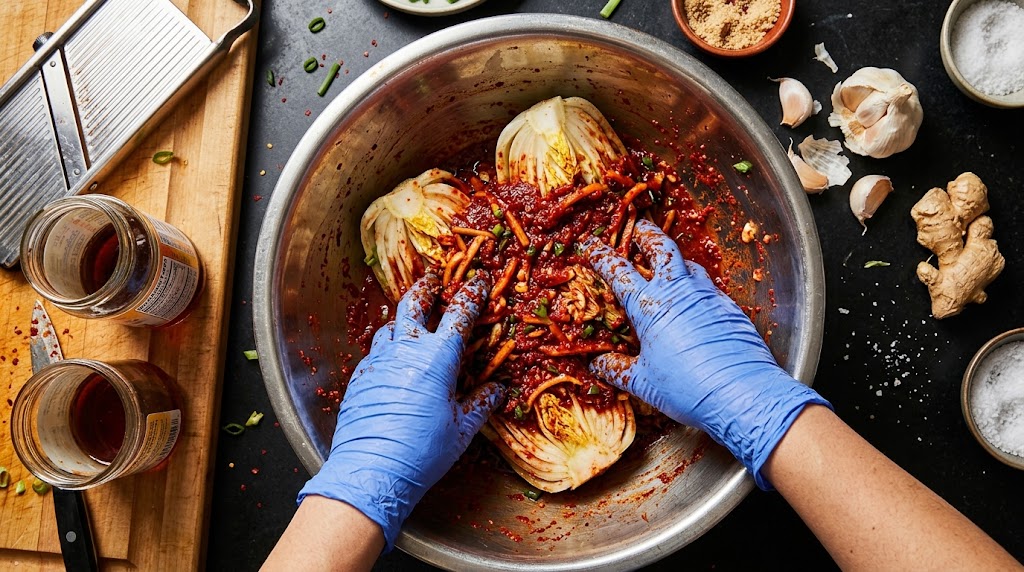
Kimchi is one of the simplest fermented foods to make at home, and one of the most rewarding. The equipment is basic, the ingredients are available at most supermarkets, and the process is forgiving enough that even a sloppy first attempt usually produces something edible. The fermentation happens because of salt, time, and the lactobacillus bacteria already present on the cabbage leaves. Your job is to create the right conditions and stay out of the way.
That said, the right equipment makes the process cleaner, more predictable, and less likely to end with brine on the counter or mold on the surface. Here is what you actually need.
The fermentation vessel: jar vs crock
The classic Korean vessel for kimchi is an onggi, a breathable earthenware crock. Onggi pots allow gas to escape through microscopic pores in the clay while keeping contaminants out. They are beautiful objects, but they are also heavy, fragile, and take up significant counter or refrigerator space.
For most home kimchi makers, a wide-mouth glass jar or a dedicated fermentation crock is more practical. The Crazy Korean Cooking 1.6-gallon fermentation container is purpose-built for kimchi. It has an inner vacuum lid that presses the kimchi below the brine level, an outer lid for sealing, and a venting system for gas release. It is not traditional, but it solves the three main problems of home kimchi making: submersion, gas management, and mess containment.
If you prefer glass, a half-gallon wide-mouth mason jar with an airlock lid works well for batches up to about 1kg of prepared kimchi. For larger batches, multiple jars or a 2-gallon crock is practical.
Cutting board and knife
Kimchi preparation is primarily a cutting job. Napa cabbage is quartered, salted, rinsed, and then cut into bite-size pieces. Radish is julienned. Green onions are cut into lengths. Garlic and ginger are minced.
A large cutting board (at least 40cm wide) is important because napa cabbage is bulky. A sharp chef's knife handles all the cutting. Some kimchi recipes call for Korean radish (mu) to be julienned, which is tedious with a knife but fast with a Benriner mandoline slicer using the julienne blade. Not essential, but if you plan to make kimchi regularly, the mandoline pays for itself in time saved.
Mixing bowls: go large
The salting stage requires a bowl large enough to hold quartered napa cabbage covered in salt. A standard kitchen mixing bowl is usually too small. You need a bowl or basin that holds at least 6 to 8 litres to comfortably salt and massage a single head of napa cabbage.
A large stainless steel bowl works. So does a clean plastic basin or even a clean bucket. The material does not matter as long as it is food-safe and large enough that you can toss the cabbage without spillover.
Gloves
Korean chilli flakes (gochugaru) are not as hot as pure capsaicin, but they stain and they irritate. Mixing the kimchi paste by hand (the traditional method, and still the most effective) with bare hands means red, slightly burning fingers for the rest of the day. Nitrile or latex gloves solve this entirely. Buy a box and use a fresh pair for each batch.
Fermentation weights
Keeping kimchi submerged is the single most important factor in preventing surface mold. In a traditional onggi, the sheer weight of the kimchi presses itself down. In a glass jar, you need a fermentation weight to hold the vegetables below the brine line.
Glass weights sized for wide-mouth mason jars work for jar ferments. For larger crocks, a plate that fits inside the opening topped with a clean jar of water serves the same purpose. The dedicated kimchi container mentioned above has a built-in press that handles submersion automatically.
Gochugaru and other ingredients
The quality of your gochugaru (Korean red pepper flakes) matters more than your equipment. Gochugaru is coarser than Western chilli flakes, slightly sweet, and moderately hot. It provides the colour, flavour backbone, and texture of kimchi paste. Regular Western chilli powder or cayenne is not a substitute; it will produce something red and spicy but not recognisably kimchi.
Look for sun-dried gochugaru in resealable bags. Tae-kyung, Wang, and Mother In Law brands are widely available on Amazon. A 1-pound bag is enough for several batches. Store opened bags in the freezer to preserve colour and flavour.
Fish sauce and salted shrimp (optional but traditional)
Authentic kimchi seasoning includes fermented fish sauce and/or salted shrimp paste (saeujeot). These add umami depth that is hard to replicate without them. For vegan kimchi, miso paste or soy sauce provides similar umami, though the flavour profile is different.
The Red Boat fish sauce is a widely recommended option. It is a two-ingredient product (anchovies and salt), no sugar or preservatives, and the flavour is clean and strong without being overwhelming.
FAQ
How much salt do I need for kimchi?
The salting stage uses approximately 50g of coarse salt per 1kg of napa cabbage. This is for the initial wilt, not the final salt level. After salting for 2 to 4 hours, you rinse the cabbage thoroughly, which washes away most of the surface salt. The final kimchi paste adds additional seasoning. The total salt content of finished kimchi is typically 2% to 3% by weight.
Can I ferment kimchi in a plastic container?
Food-grade plastic works but stains permanently. The red from gochugaru does not wash out. If you use plastic, designate it as your kimchi container and accept the colour. Glass does not stain and is easier to clean.
My kimchi is too sour. What went wrong?
Nothing went wrong. It fermented longer than you preferred. Move it to the fridge earlier next time. Very sour kimchi is still perfectly safe and useful: it works well in fried rice, stews (kimchi jjigae), pancakes (kimchijeon), and any cooked application where the sharpness mellows with heat.
As an Amazon Associate, I earn from qualifying purchases. Product links on this page may earn Culture & Crumb a small commission at no extra cost to you.